From a dead Proxmox box to a 2-node ZimaBlade cluster
It was fine. Until it wasn’t.
My Proxmox server died on me. One box, all my VMs, and suddenly the house got very quiet: no Hermes, no Sonarr, and no Uptime Kuma to even tell me things were down. It ran on an old single-board computer that simply stopped working one day. Old hardware with a thick layer of dust on it, so my money is on the power supply.
The good news: the disks of my VMs were on my Synology. The better news: I already had six ZimaBlade 7700 boards waiting for a project. So instead of rebuilding the same single point of failure, I built a small 2-node Proxmox cluster on two of them. The other four are saved for a Ceph experiment (that’s a future post).
This post is mostly for future-me, but if your homelab just went dark too, it might save you an evening.
The hardware
The ZimaBlade 7700 is a tiny, passively cooled x86 board. Per board you get a quad-core Intel Celeron, one DDR3L SO-DIMM slot (max 16 GB), 32 GB eMMC, two powered SATA ports, one 1 GbE port and a PCIe 2.0 x4 slot.
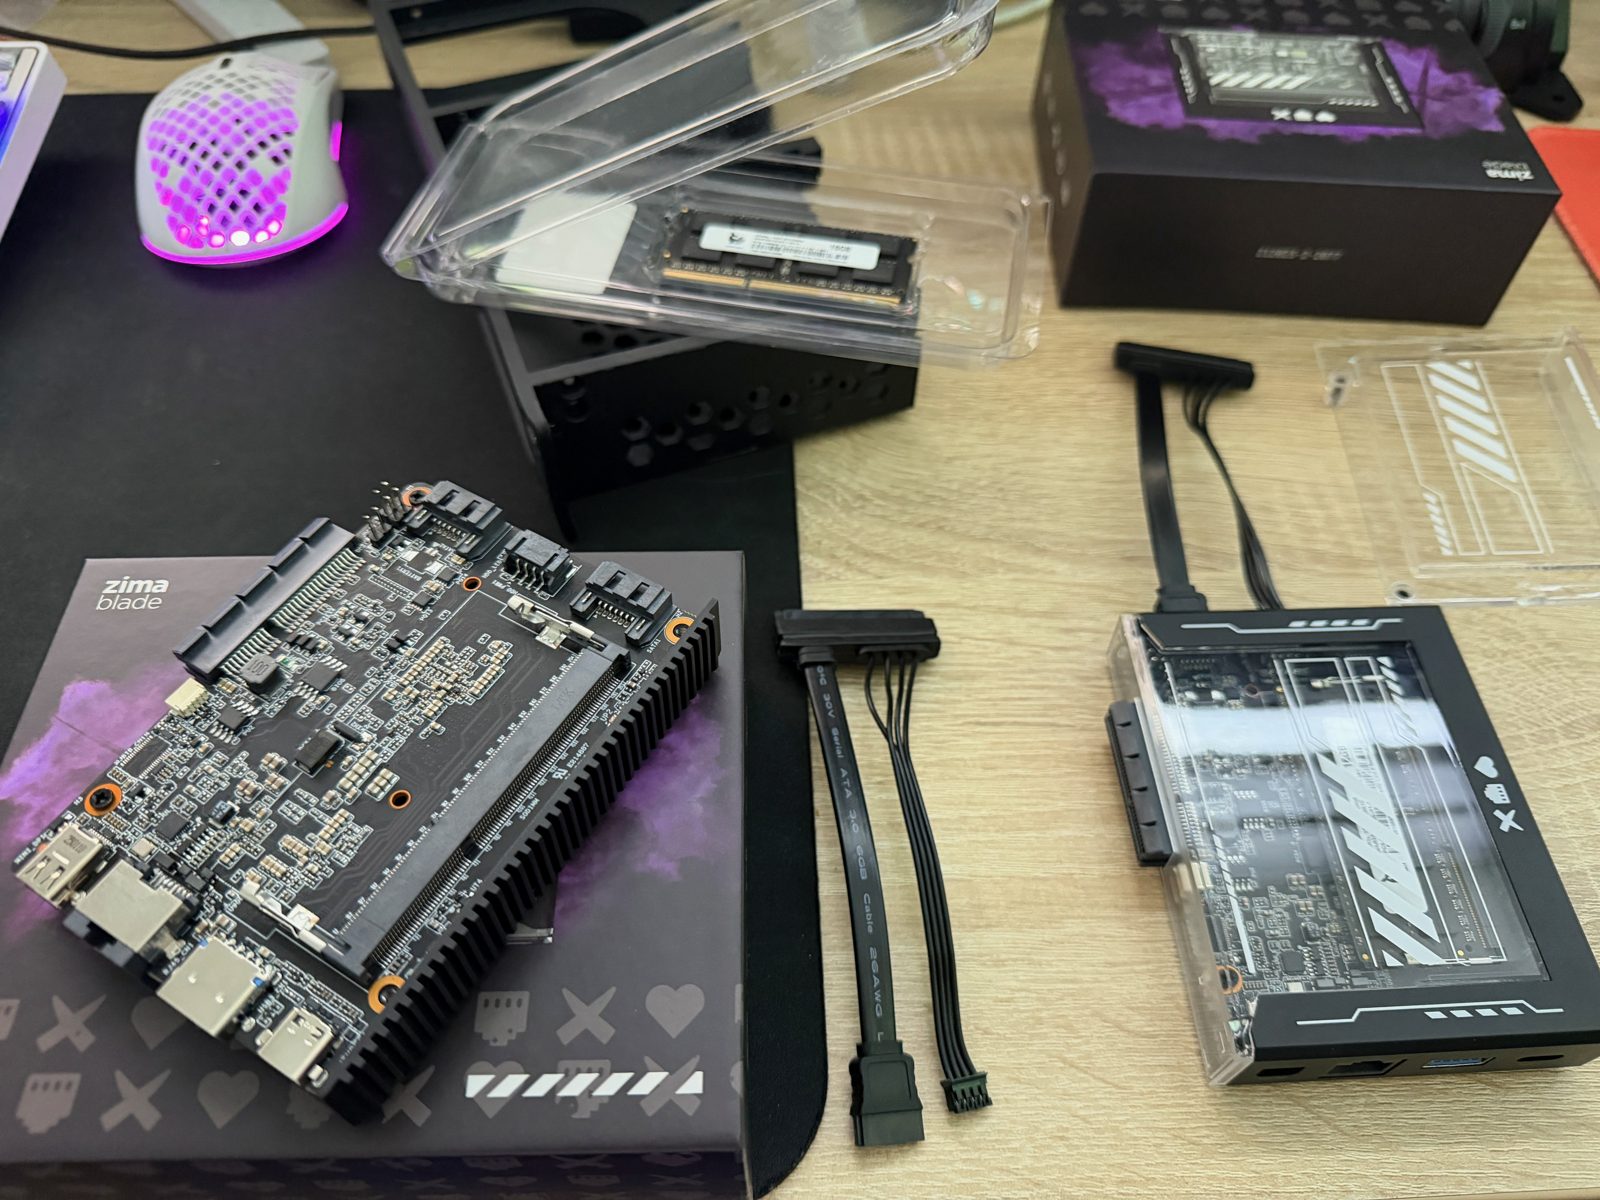
Per node I added 16 GB of RAM (the maximum) and a 1 TB PNY SATA SSD.
The boards are tiny, which makes them annoying to keep tidy. So I 3D printed a front that holds both the node and its SSD in one piece. It slots into the 10 inch rack I use for these small projects. The rack itself gets its own post later.
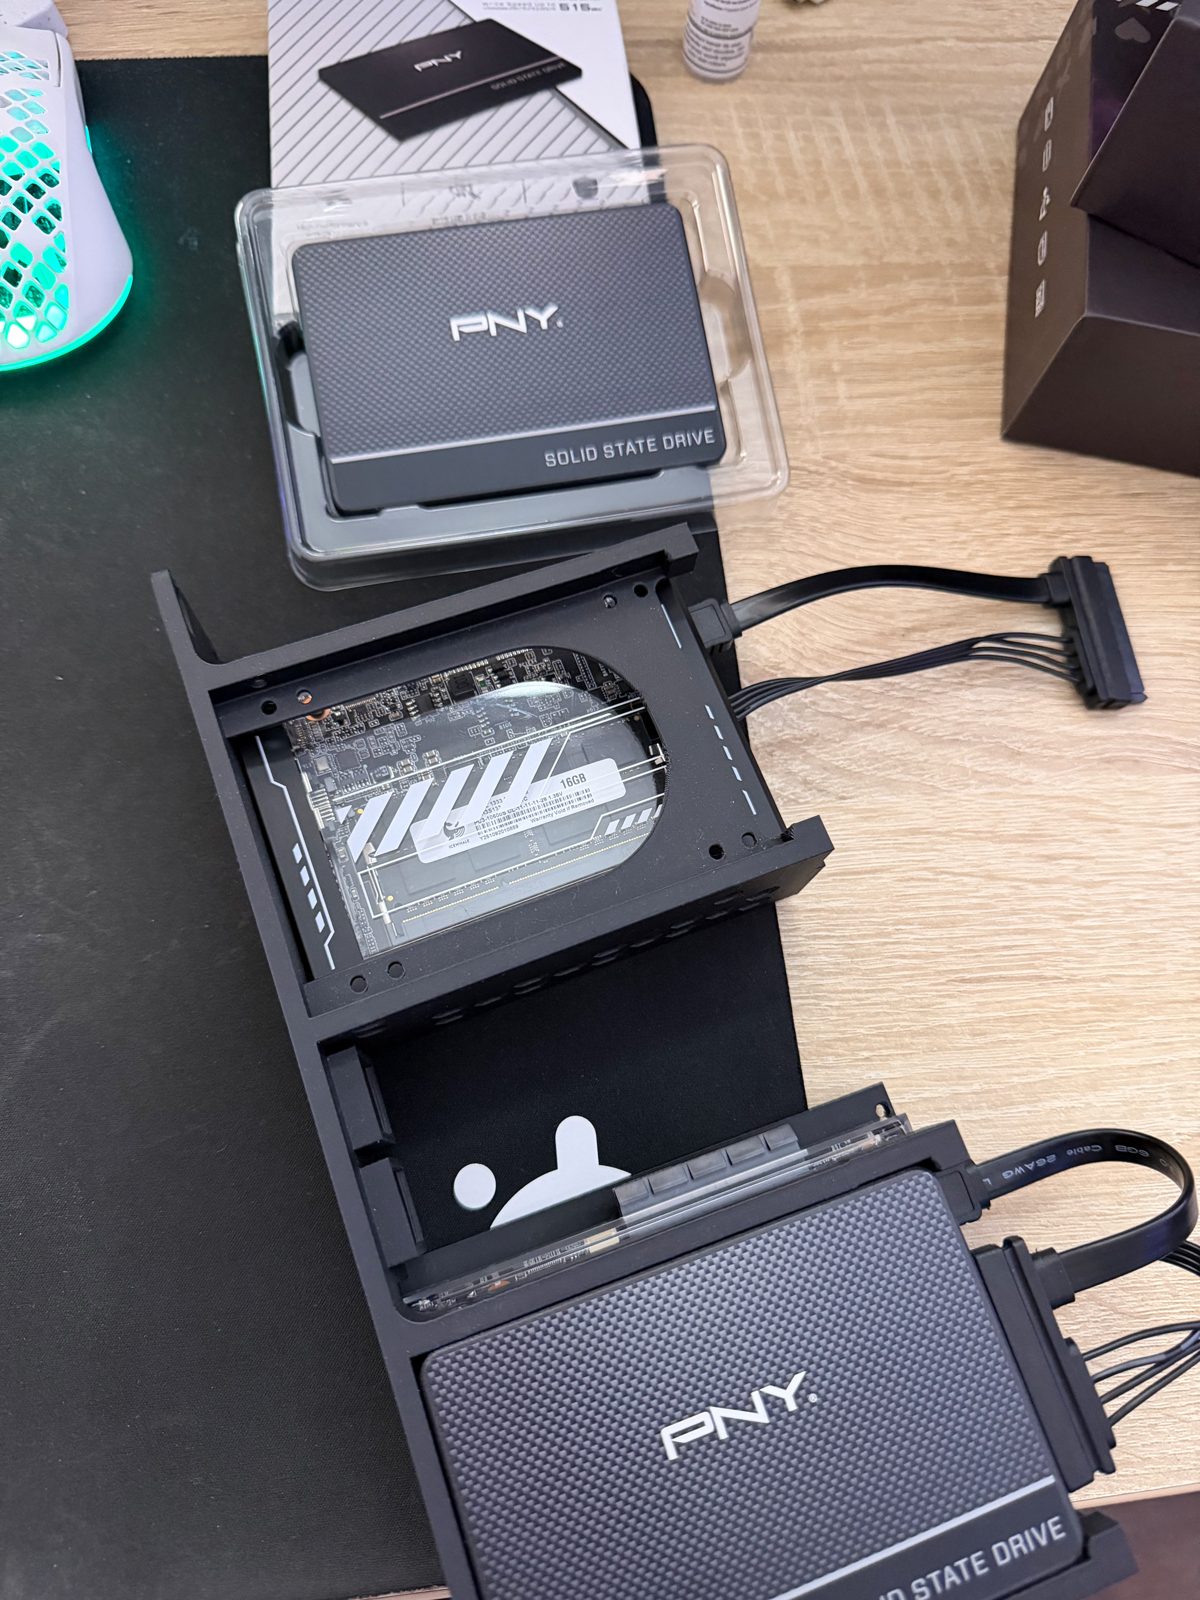
Two things to know up front. The CPU has no AVX, which matters when you restore VMs (more on that later). And I skipped the eMMC for Proxmox: it wears out fast under constant logging.
Installing Proxmox VE 9.2
First, the USB stick. Always check the checksum, it takes ten seconds:
sha256sum proxmox-ve_9.2-1.iso
dd if=proxmox-ve_9.2-1.iso of=/dev/sdX bs=4M status=progress conv=fsync
In the BIOS I enabled VT-x and VT-d and put USB first. The install itself is the usual Proxmox wizard. My choices: the SSD as target, ext4 instead of ZFS (ZFS likes a lot of RAM and 16 GB is not a lot), and fixed IPs 192.168.1.21 and .22 for zb1 and zb2. I run DHCP at home, so I picked addresses outside the DHCP pool.
After the install I switched to the free no-subscription repo. On Proxmox 9 the GUI does this best: Updates → Repositories, disable the enterprise ones, add No-Subscription. Then:
apt update && apt full-upgrade -yI also put both nodes in /etc/hosts on each node, so the cluster doesn’t depend on DNS. Repeat on the second board, coffee in between.
Building the cluster
This part is almost suspiciously easy. On the first node:
pvecm create homelabThen on the second node:
pvecm add 192.168.1.21And check:
pvecm statusThe catch with two nodes: quorum needs a majority, and with two votes that means both. Lose one node and the cluster freezes. Your VMs keep running, but you can’t start, stop or migrate anything. The fix is a QDevice, a tiny vote-only service on something that’s always on. Mine runs on the Synology, which is on 24/7 anyway:
apt install corosync-qnetd          # on the Synology (QDevice host)
apt install corosync-qdevice        # on both nodes
pvecm qdevice setup <qdevice-ip>    # on zb1
After that, pvecm status shows three expected votes and the cluster survives a node going down.
Hooking up the Synology
On the Synology I enabled NFS (Control Panel → File Services) and gave the share an NFS rule for my LAN: read/write, Map root to admin, and Allow connections from non-privileged ports.
Because storage config is cluster-wide, you only add it once:
showmount -e 192.168.1.10
pvesm add nfs synology --server 192.168.1.10 --export /volume1/proxmox \
  --content backup,iso,vztmpl --options vers=4.1
My “backups” were raw disk files, not proper Proxmox backups. They show up under /mnt/pve/synology/ and can stay right where they are.
Restoring the VMs
Three guests to bring back: Uptime Kuma, Hermes and Sonarr. The catch with raw disk files: you get the disk, not the VM. No CPU, no RAM, no network settings. So every guest gets rebuilt around its disk.
First, figure out what you’re holding:
qemu-img info vm-101-disk-0.raw   # virtual size
file vm-101-disk-0.raw            # partition table = VM, bare ext4 = container
fdisk -l vm-101-disk-0.raw        # EFI System partition = UEFI boot
For a VM, create an empty shell and import the disk. I reused the old MAC from my DHCP lease list, so the guest came back on its old IP:
qm create 101 --name hermes --memory 4096 --cores 2 --cpu x86-64-v2-AES \
  --net0 virtio=<old-mac>,bridge=vmbr0 --scsihw virtio-scsi-single --ostype l26
qm disk import 101 /mnt/pve/synology/<folder>/vm-101-disk-0.raw local-lvm
qm set 101 --scsi0 local-lvm:vm-101-disk-0 --boot order=scsi0
qm start 101
For a container, I copied the raw file block-for-block onto a fresh volume. That keeps the file ownership of an unprivileged container intact. Then I wrote the config by hand:
pvesm alloc local-lvm 102 vm-102-disk-0 8G
dd if=vm-102-disk-0.raw of=/dev/pve/vm-102-disk-0 bs=4M status=progress conv=sparse
# then /etc/pve/lxc/102.conf with rootfs, net0 (old MAC), memory, unprivileged: 1
pct start 102
The --cpu x86-64-v2-AES is not optional on these boards: there’s no AVX.
The biggest catch for me: the old server was dead, so I had no access to its setup. No VM configs, no container settings to copy. Every guest was a matter of importing the raw file and rebuilding the container around it. Annoying, but the data was all there, and that’s what counts.
Uptime Kuma lives on zb2, apart from the rest, so it actually notices when zb1 goes down.
Lessons learned
- Backups saved me, so I made them boring. A nightly job now runs straight to the Synology:
pvesh create /cluster/backup --schedule "02:00" --storage synology --all 1 \ --mode snapshot --compress zstd --prune-backups keep-daily=7,keep-weekly=4 - Test a restore. A backup you never restored is a hope, not a backup.
- Check the CPU type when you move VMs to older or smaller hardware.
- Mind the single NIC. A second NIC in the PCIe slot for cluster traffic is on my wishlist.
Net effect: one dead box turned into two small ones plus a tie-breaker, and losing a node now means migrating a few VMs instead of a silent house.
Next up: the 10 inch rack and the 3D printed fronts, and after that the other four ZimaBlades get a go at Ceph.